Oskitone Scout Assembly from oskitone on Vimeo.
Putting together the Oskitone Scout, after it's been soldered
http://www.oskitone.com/product/scout-synth-diy-electronics-kit
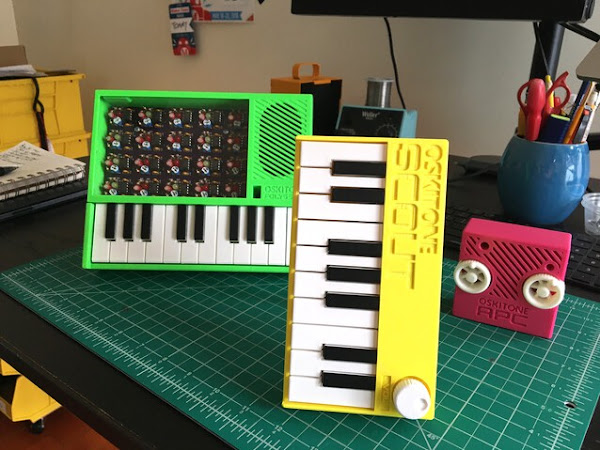
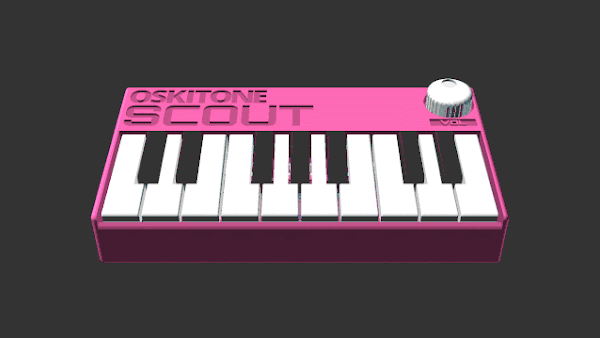 It's called the "Scout" because it's the first Oskitone synth to use a microcontroller, specifically the ATmega328 -- just like the Arduino Uno.
From the readme:
scout (/skout/):
One sent to obtain information
Jean Louise “Scout” Finch, of Atticus Finch
The first synth from Oskitone to venture into the big ol' world of microcontrollers
The Scout is:
Beginner-friendly: All components are through-hole (instead of surface mount) for easier soldering, and full assembly takes about 45min. Standalone, battery-powered, doesn't need a computer or external speakers to work. Fun! 3D-Printable: Besides the electronics and nuts and bolts, all parts are 3D-printed. And with a total width of ~160mm (about 6.3"), the Scout can fit on smaller, "Mini" (18x18x18cm) size print beds.
Hackable: Arduino-compatible and fully open source! Hook up an FTDI Serial TTL-232 cable (sold separately) to update its code using the Arduino IDE.
Minimally featured: 1.5 octaves of keys, a volume knob, on/off switch, speaker, headphone jack. Monophonic square wave with fixed glide and octave.
In addition to it being the first microcontroller-controlled instrument from Oskitone, the Scout would also make a fine introductory DIY instrument for the budding electronics hobbyist. (Some experience soldering and a general familiarity with how electricity works are recommended though!)
Like my previous work, I designed the Scout's PCB in Kicad and everything else in OpenSCAD, specifically for 3D-printing. The Scout is available assembled or as a DIY kit, with and without the 3D-printed parts; and it's fully Open Source!"
via https://blog.tommy.sh/posts/scout/