MATRIXSYNTH: Search results for Arduino Uno


Showing posts sorted by relevance for query Arduino Uno. Sort by date Show all posts

Saturday, April 02, 2011

The Beat707 Arduino Shield


YouTube by beat707videos
http://www.beat707.com
Playlist:
The Beat707 Arduino Shield
Beat707 Showcasing
Beat707 File Mode
Beat707 Pattern Mode
Beat707 Tutorial

"Beat707 is an Arduino Shield that adds several neat features to your musical arsenal. You get a 32 step machine, with 16 step buttons and leds, LCD screen and navigation keys. It's like the classic Roland TR707 but with some twists, as it actually has 32 x 1/32 or 32 x 1/64 steps. Plus, the 2 note-step sequence feature allows you to do bass and/or synth lines -- it's a MIDI groove-box all in one ! The unit doesn't produce any sound, it's all MIDI based, so you can use any MIDI compatible device.

Beat707 is an Arduino Shield that adds several neat features to your musical arsenal. You get a 32 step machine, with 16 step buttons and leds, LCD screen and navigation keys. It's like the classic Roland TR707 but with some twists, as it actually has 32 x 1/32 or 32 x 1/64 steps. Plus, the 2 note-step sequence feature allows you to do bass and/or synth lines -- it's a MIDI groove-box all in one ! The unit doesn't produce any sound, it's all MIDI based, so you can use any MIDI compatible device.

This project is a joint collaboration between Wusik.com and Rugged Circuits. We've made a proper Arduino shield that plugs in on top of an Arduino Uno, Duemilanove, or Mega/Mega2560 (not included). The software performs all the drum machine functions, but you can always tweak it to do whatever you want (with the source code purchase). We've added EEPROM, FLASH, and expandability options and connectors.

And it's not just a drum machine: the hardware is a general-purpose MIDI development platform and playground. The awesome software from Wusik.com is what provides the drum machine functionality, but you can run any software you want on your Arduino to make use of the hardware.

Here are the project specs:
Arduino shield that plugs on top of an Arduino Uno, Duemilanove, Mega, or Mega2560
512 kbytes of FLASH (beyond what's on the Arduino)
32kbytes of EEPROM (beyond what's on the Arduino), expandable to 128kbytes by adding more EEPROM chips (total of 4 EEPROM slots)
16 buttons with LED for each button
8 buttons for control functions (intended for up, down, left, right, shift, play, stop, record)
16x2 LCD with backlight
MIDI IN and MIDI OUT interfaces
System operation at 5V or 3.3V
Designed to be compatible with Arduinos as well as Netduino and FEZ Panda

The Wusik.com drum machine software provides:
14 Drum Tracks + 2 Accent Tracks (a total of 3 MIDI-note velocities can be sent from each step)
2 Step-Sequence Tracks (each step has its own Note selection, Velocity is set by the accent tracks)
Multi Pattern and Song Mode
Number of Patterns and Songs depends on the total amount of system EEPROM -- the base system provision of 32kbytes of EEPROM has enough for 94 patterns and 99 songs positions. The included Flash Nand memory can hold up to 42 songs. (see more below)
Each pattern has 32 x 1/32 or 32 x 1/64 steps and 14 tracks + 2 accent tracks
Each track has a note-number and MIDI-channel number, so you can also use tracks to output regular notes (one note fixed per track)
Optional MIDI echo (set during compilation and uploading of the Sketch)
File Mode for storing up to 42 songs into the internal Flash. With options to Load, Save, Dump to SySex MIDI and Erase"

Sunday, August 16, 2015

Soulsby Synthesizers Atmegatron in 90 seconds


Published on Aug 16, 2015 Soulsby Synthesizers

"The Atmegatron is an 8-bit MIDI synthesizer. This video gives an overview of what it can do.
Music by _ensnare_ and created entirely on the Atmegatron. Hear the full track hear:"


miniAtmegatron posted here.

Update: and the press release:

"London, UK - 24/8/15. Soulsby Synths are relaunching their 8-bit synth The Atmegatron today at the new price of £199 / €299 / $299. They are available from their website and from retailers around the world (see website for full list). They are also launching a new product, the miniAtmegatron, which is an electronics kit shield for the Arduino Uno. It retails at £29 / €39 / $39.

The Atmegatron was first launched in March 2014 and received a fantastic response from magazines and websites. The synth features 32 waveforms, 16 digital filter types, 2 envelopes, 16 LFO shapes, Arpeggiator, crunchy Wavecrusher and much more. As well as having a unique sound, The Atmegatron can shape-shift into other synths by uploading free software from the website. These include a drum machine, duophonic synth and delay synth.

The relaunched Atmegatron features software completely rewritten from the ground up, adding improvements and new features, while retaining it’s classic sound. These include options for exponential envelope shapes, note priority and a more phasey phaser!

The miniAtmegatron is designed for electronics enthusiasts that want to experience the basics of the Atmegatron sound. The kit includes a PCB, all components and instructions. The Arduino Uno is not included. The build time is between 0.5-1 hours depending on soldering experience.

The miniAtmegatron contains a lot of the Atmegatron’s features although some are cutback because of the simpler user interface. The Arduino Uno can be MIDI-hacked, allowing the miniAtmegatron to be controlled via MIDI over USB.

Paul Soulsby, CEO of Soulsby Synthesizers: “It took a lot of hard work, but I am so pleased that we have managed to significantly lower the price of the Atmegatron and still retain classic features like the wooden side panels. I also hope that the miniAtmegatron will introduce Arduino fans to the joyous bleeps of 8-bit music!”

About Soulsby Synthesizers:
Soulsby Synthesizers is run entirely by Paul Soulsby, who started the company in 2013. The Atmegatron is the company’s debut synthesizer and the miniAtmegatron is their second. The company is based in London."

Comparison chart here.

Sunday, March 06, 2011

Arduino Drum Machine Step-Sequencer / Groove-Box


YouTube Uploaded by williamkalfelz on Jan 19, 2011

'For Version 1.0.4 we added 2 Step-Note Tracks for Bass and Synth lines. This is a short demonstration of 2 patterns playing both Drums and 2 Synth Lines.

Those two new tracks, S1 and S2, have Note Selection per Step, Note-Off and Slide.

http://arduino.wusik.com
http://open.wusik.com"


via Rugged Circuits

Details via kickstarter:
"The Arduino Drum Machine is a 14-track Drum-Machine Step Sequencer with 2 accent tracks and 32 steps. Check out the videos -- it's a lot easier to understand when you see it: [videos above]

The Arduino Drum Machine is like the classic Roland TR707 but with some twists, as it actually has 32 x 1/32 or 32 x 1/64 steps. The 2 note-step sequence feature allows you to do bass and/or synth lines -- it's a MIDI groove-box!

Here's a picture of the first prototype PCB: http://ruggedcircuits.com/images/adm_proto1.jpg

And here are some videos of the first prototype working with a Duemilanove:

http://youtu.be/t5THWALtiw4

http://www.youtube.com/watch?v=I8WoKL1BMRc

Once we get this prototype into Wusik.com's hands we'll post a video of the whole drum machine software+hardware working together.

----------------------------------------------------------------------

This project is a joint collaboration between Wusik.com and Rugged Circuits. We've taken the breadboard prototype of the drum machine shown in the videos and made it into a proper Arduino shield that plugs in on top of an Arduino Uno, Duemilanove, or Mega/Mega2560 (not included). The software performs all the drum machine functions, but you can always tweak it to do whatever you want (with the source code reward levels). We will provide sample source code at all reward levels showing basic usage of all hardware on the shield.

We've added EEPROM, FLASH, and expandability options and connectors. Suggestions from backers are welcome too (as long as they don't break the bank!)

And it's not just a drum machine: the hardware is a general-purpose MIDI development platform and playground. The awesome software from Wusik.com is what provides the drum machine functionality, but you can run any software you want on your Arduino to make use of the hardware.

Here are the project specs:

* Arduino shield (we're aiming for about 8" x 3") that plugs on top of an Arduino Uno, Duemilanove, Mega, or Mega2560
* 512 kbytes of FLASH (beyond what's on the Arduino)
* 32kbytes of EEPROM (beyond what's on the Arduino), expandable to 128kbytes by adding more EEPROM chips
* 16 buttons with LED for each button
* 8 buttons for control functions (intended for up, down, left, right, shift, play, stop, record)
* 16x2 LCD with backlight
* MIDI IN and MIDI OUT interfaces
* System operation at 5V or 3.3V
* Designed to be compatible with Arduinos as well as Netduino and FEZ Panda

The Wusik.com drum machine software provides:

* 14 Drum Tracks + 2 Accent Tracks (a total of 3 MIDI-note velocities can be sent from each step)
* 2 Step-Sequence Tracks (each step has its own Note selection, Velocity is set by the accent tracks)
* Multi Pattern and Song Mode
* Number of Patterns and Songs depends on the total amount of system EEPROM -- the base system provision of 32kbytes of EEPROM has enough for 99 patterns and 99 songs
* Each pattern has 32 x 1/32 or 32 x 1/64 steps and 14 tracks + 2 accent tracks
* Each track has a note-number and MIDI-channel number, so you can also use tracks to output regular notes (one note fixed per track)
* Optional MIDI echo

NOTE: International backers (outside the USA) PLEASE ADD USD$10 to your pledge for any reward levels that require shipping physical items (that is, $50 and up). These items will ship by US Priority Mail International and usually take 6-10 days to arrive (though it is not guaranteed). Shipping by courier companies like UPS or DHL is much more expensive but allows for shipment tracking -- please contact us for prices. Also please contact us for combined shipping prices for group buys and multiple-order pledges."

Friday, May 20, 2011

Beat707 Arduino Drum Sequencer Review by Altitude

http://www.beat707.com
"This project was brought to my attention a month ago and it immediately caught my eye as a perfect solution for a sequencer for my 9090 TR-909 clone.

Quick Run Down:
The Beat707 is a Arduino shield (meaning hardware front end) and software for an Arduino (Uno/2009/Mega) hardware platform. The Beat707 hardware can be purchased via their website assembled for $100 (An Arduino MIDI Groove Box Shield). Their website has a number of video demos that I recommend everyone check out. An arduino will run you $15-$65 depending on what you get and where you get it. I opted for an Uno for $30 but am upgrading to a Mega since the code limit for the 2009/Uno has pretty much been met. Anyone looking into getting one, I recommend a mega (Chinese clones are ~$40).

The hardware is simple to assemble, simply join the Arduino and the Beat707 (pins and headers) and upload the software. Arduino has its own software to upload the apps to the hardware and it is trivial to use (no programming knowledge required)

The Hardware:
The controls are straight forward. Sixteen step buttons, 4 navigation buttons, Stop/play/record/shift. Ports are midi in/out, Power, USB. It can be powered via USB and it also has a midi over USB function.

Here is mine. I opted for different style buttons from the kit to better suit my case. I also have two mods installed (more on that later)


The software:
The sequencer consists of 18 tracks: 14 drum instrument tracks, 2 monosynth tracks, and two accent tracks. Each drum voice can be set to a different midi channel and note. The names can easily be edited in the software so you don't have to have them named according the to GM names.

Editing the drum tracks is pretty much identical to the Tr-707. There is a A/B variation for each track giving a total of 32 steps (and it even goes beyond this, however I have not played around with that feature). The combination of the shift key gives access to editing and quick jump parameters (copy/paste/mute/solo etc). Pattern edit mode is your classic x0x style editing and there is also a realtime record where each of the 16 keys represents and instrument (again, like the 707)

The two synth tracks work considerably differently than the drum tracks and each note is entered per step and remains on until a note off event is programmed (to hold notes) or another note begins. There is also a slide function to slide between notes. What I really dig about the synth tracks is that with a keyboard attached, you can simply play in the notes from a keyboard. A clever scheme is used where a light note press (low velocity) is recorded as a rest and a hard press records that note. Both events advance the sequence to the next step. Quite fun to use.

Hacks and Mods:
The designer built in quite a bit of expandability so it is very easy to add features. Like I show above, I added an analog pot (which can be assigned to a number of parameters) and an encoder which allows for quick editing of parameters. There are also a number of switch inputs that can be used for a variety of things (footswitch start/stop). Trigger outputs are also built in to trigger non-midi external drum voices.

At this time, there is no case or faceplate for the Beat707 (coming soon afaik) so I designed my own enclosure based on an extruded Hammond box and a CNC made panel. I used lightpipes for the LEDs since they are mounted to the board and SMD parts."

Tuesday, September 11, 2018

KnobCon 7 (2018) part 16 - Detroit Underground & the DU-INO: The Ultimate Eurorack Arduino Shield


Published on Sep 11, 2018 SynthMania

"Aaron shows their latest Arduino based diy module "shield", the DUIno"

Details via Kickstarter:


"What is DU-INO?

In a nutshell? It's whatever you want it to be, in 14 HP.

If you're feeling verbose, call DU-INO a compact programmable digital-analog function platform. With 14 total configurable I/O, using precision ADC and DAC circuits and an analog computer, a vast array of functions are possible. A graphical OLED display and various tactile inputs offer a rich user interface.

It’s essentially the ultimate Eurorack Arduino shield. Supplying your own Arduino (or other shield-compatible microcontroller board), you can select from our growing library of functions, or use our full-featured open source Arduino library to write your own!

Just a few of the myriad A to Z functions to which the DU-INO hardware and software lends itself include arpeggiators, 8-bit oscillators, clock sources and modulators, delays, envelope generators, function generators, glitch effects, harmonic generators, inverters, jack routers, key shifters, LFOs, MIDI interfaces, noise sources, oscilloscopes, parameter storage, quantizers, randomizers, sequencers, transports, utilities of all sorts, VCAs, waveshapers... well, I made it to W!

And, did I mention that they can talk to each other (and other expansion modules) over I2C?"

Additional Demos:

Monday, March 08, 2021

Song mode & generative sequencing on Super Sixteen Firmware v1.1 (tutorial)


video by Extralife

"Installing new 1.1 firmware on the Super Sixteen. Get the firmware update here:
https://github.com/matthewcieplak/sup...

Get the Pololu USB AVR programmer 2.1 (any AVR programmer will work!)
https://www.pololu.com/product/3172

Get the arduino IDE here:
https://www.arduino.cc/en/software

OR Get avrdude here:
https://www.nongnu.org/avrdude/

00:21​ Intro
00:50​ Generative mutations
03:43​ Sequence chain / song mode
06:08​ Note name display mode
07:17​ Connect AVR programmer (SMT)
09:06​ Connect AVR programmer (DIY)
09:54​ Arduino Uno as ICSP
10:45​ Arduino connections (SMT)
13:41​ Arduino connections (DIY)
15:10​ Downloading the firmware/AVRdude
16:12​ Upload via cmd/terminal
17:23​ Troubleshooting common errors
18:38​ Upload via Arduino Uno
19:12​ Finding avrdude when installed via Arduino IDE
21:11​ Installing via source/IDE (AVR programmer only)
24:33​ Updated documentation"

Thursday, October 27, 2011

Arduino Uno Granular Synth

Playing with my Arduino Uno Granular Synth

YouTube Uploaded by samuelietto on Oct 18, 2011

"Simple Granular Synth I made with an Ardiuno Uno Chip,

No bass due to iPhone recording :(

www.facebook.com/samueliettomusic"

Sunday, April 16, 2017

Generative Music by Gibran Curtiss


Published on Apr 16, 2017 Gibran Curtiss

Playlist:

1. Generative music - part I

"Still an embryonic project of Generative Music in Arduino plataform and Midi protocol using simple biological algorithms to birth , growth, reproduction and death , together with locomotion and collision . This video was the result of one day of coding, so.... The 4 tempo was reduced to 1 to make a little short video. Long journey yet to come."

2. Generative Music - part II

"Second video of generative music project.
Arduino Uno replaced by Arduino Mega.
Arduino goes to USB MIDI interface, that goes to laptop running ableton driving 3 Midi channels.
The original algorithm was improved a lot and were added some controls to make intentional transitions.

Credits: Adam Kumpf for the core algorithm."

3. Generative music - part III

"Another sample with a generative music Arduino prototype."

4. Generative Music - part IV

"Another great step forward to my generetive music project.
These are the 2 major changes in project:
a)the first 3 videos I've made, the Arduino was connected to a laptop by MIDI. Now 2 full 5V CV OUTs available (3 at the moment I'm writing this) :-) provided by a DAC MCP4725
b)improvement into evolution algorithm allowing to choose to evolute or not each parameter individually. This way we can let the machine evolute by itself and then step in anytime to control the evolution.
Finally the unit is connected to a real modular synth!!! I'm very very really happy!!!!!!!!.
This video is a very simple path:
-one CV to a Qu-Bit Chord
-another CV to 4MS Spectral Multiband Resonator."

5. Generative Music V

"This is the 5th video of an Arduino Generative Music project. Finally a reasonable result. 4 midi channel / 4 CV outputs (0-5V). In this video only 2 channels used."

6. Generative Music Part VI

"This is the Part VI of the Generative Music project. A friend asked me to explore all 4 channels. So here it is. A lot better that last one video. But still a lot to improve on the next. Remember that this project is a SUPPORT tool to provide some melody, not make an entire song. Now the next goal is to attach a solar panel and some sensors : temperature , pressure, light, air humidity, soil humidity, wind velocity. All together and a little math will be able to make music according to weather variations including wake up and go to sleep. It will be an self sufficient being. Like a mini Frankenstein that makes music."

7. Generative Music part VII

"This time the fully functional prototype of the generative music module patched to the 4MS SMR passing thru a custom Spring Reverb.
One square wave oscillator with a fixed frequency feeding the 4MS input.
The final configuration of the module is :
-4 (0V to +5V) CV outs with buffered MCP4725 DACs.
-1 Trigger out with led indicator;
-parameter / value knobs to control the internal variables;

Again, some code improvements to do a better control over the note distribution to CVs.
The evolution of the generative module was locked this time just to play around with 4MS, basically, the same melody all the time but exploring the internal variations of the CVs.
Remember that the whole sound was played ONLY by the 4MS. No drum machines, no other modules."

8. Generative Music part VIII

"This time added a control to interval or cycle a group of 2,4,8,16,32 notes.
Unfortunately this project will be suspended for a while.
The effort now is to develop better melodies but I dont have much time exclusively to it.
Thank you!"

Saturday, February 11, 2017

LXR Control Surface by Barcode


Published on Feb 11, 2017 Altitude909

"1st test of the Arduino based CS the the LXR drum synth

http://www.baud-rate.com/blog/2017/01..."


"The control surface hardware and software are working exactly as expected! This is such a useful tool that really opens loads of possibilities for the LXR Drum Synth.

The control surface is technically an 'Arduino Shield'. You simply populate the components on the PCB, modify the LXR Control Sketch to your liking, upload the sketch your Arduino Uno, and plug in the Arduino Uno to the PCB. You now have a very powerful midi controller designed for your very powerful LXR Drum Synth."

Friday, December 30, 2016

Dalek Arduino Synthesizer 2016


Published on Dec 30, 2016 Martin Orman
Update: Re-Published on Jan 5, 2017

"I picked up this Dalek from a car boot sale so it's a bit battered. I installed a synthesizer written onto an ATMEGA 328P chip (Arduino Uno clone that I built) inside. It runs on battery or 9v DC mains adapter in. There are two mono outputs i.e. 3.5mm and 1/4". It's possible to run both outputs together in order to set up two audio channels in your DAW that will create a stereo output. This is recorded into Ableton 9 through a Focusrite Scarlett 18i8 with standard reverb, compression and Reaktor Molekular 'Plagiarism' added to give some additional harmonics."

Note: if you are interested in one or the instructions you can ping Martin Orman over on YouTube for details.

New description from Jan 5, 2017 upload:

"I converted this Dalek into a granular synthesizer. Inside is an ATMEGA 328P clone of an Arduino Uno that I built. It has two line level outputs and runs on 5v to 9v D.C. from battery or mains adapater."

Sunday, January 19, 2014

The Toa Mata Band - Tiny Robots Playing Tiny Synths

Toa Mata Band - A little tribute

Published on Apr 8, 2013 Opificio Sonico·4 videos

"This teaser is a personal tribute to the band who inspired my work from the 80's ...enjoy!

The toys robots band playing live some tiny synthetizer and each member is controlled by an Arduino Uno which is hooked up to an iPad running a MIDI sequencer app.

The instruments used in this video are: Gakken SX 150 and SX 150 MKII, Dubreq Stylophone, Amdek PCK 100, Nintendo DS with Korg DS10 cartridge.
Arduino also controls the RGB LED WALL in the back.
Concept & Video by Giuseppe Acito


Flickr: http://www.flickr.com/photos/opificio...
Add me on Facebook : http://www.facebook.com/OpificioSonico
Follow : https://twitter.com/OpificioSonico
Blog: http://www.opificiosonico.com"


Toa Mata Band Episode1 Published on Mar 5, 2013

"This video is about an electronic band of toys-robot that play some tiny music instruments drived by Arduino Uno and Clavia Nordbeat, a MIDI sequencer app for iPad."

Toa Mata Band - Episode2

Published on May 19, 2013

"Toa Mata Band is back and for the first time they perform live!
In this video some various drum-synth and glockenspiel keys are played by each robot and I'm jam together them.The performance was recorded live in four takes in early May 2013, and after edited and mixed in studio."

Saturday, February 10, 2024

[Prototype] Arduino UNO R4 synthesizer : modular synth simple VCO


video upload by HAGIWO

"Modular synthesizer VCO. using Arduino uno r4 for technical verification.
Supports V/oct and audio output via built-in DAC.
Since this is a verification circuit, it is not recommended to make a module with this circuit as it is.

working documents ( schematics & code)
https://note.com/solder_state/n/na5ab..."

Saturday, September 28, 2013

Arduino Uno Controlling the 8 Note Sequencer

Published on Sep 28, 2013 Ryan Jensen·12 videos

"In this video, I go through the process of writing a sketch that will allow my Arduino Uno to control my custom 8-not sequencer that I built a while ago. A while back, I added inputs for external clock and reset. This is the first time I've actually utilized them.

This is my first video where I briefly explain how the device works:"

8 Note Sequencer
Published on Jan 10, 2013

"SCHEMATIC
http://i.imgur.com/l37EUW5.png [image below]

STEP BY STEP ARTICLE (in progress)
http://www.instructables.com/member/j...
This is my Instructables page. I'm currently writing the article. I will update the description of this video when I get the article written

DESCRIPTION
I give a demo of my 8 note sequencer and I review how it works at a fundamental level."

Saturday, March 09, 2024

[$25] DIY eurorack modular synth Hard/Soft SYNC VCO with Arduino uno R4 , digital VCO


video upload by HAGIWO

"My 76th original eurorack modular synth DIY projects.
Arduino UNO R4 based digital VCO , it has Hard/Soft SYNC function.
Since the SYNC frequency is controlled by CV, SYNC sound can be created with fewer modules.

working documents ( code & schematics)
https://note.com/solder_state/n/n79d1..."

Thursday, August 22, 2019

Nerd On The Wire DrumKid "aleatoric" Drum Machine


Published on Aug 22, 2019 Nerd On The Wire

Nerd On The Wire also brought us the Synth Guitar for DesignSpark Summer of Sound Challenge, and PolyMod open source modular synthesizer for Hackaday 2018.

"DrumKid is an 'aleatoric' drum machine, meaning it uses random numbers to determine the rhythm and sound of a drum beat. It comes in a handheld, battery-powered unit, designed for live performance.

This is my entry video for the 2019 Hackaday Prize - the Hackaday project page can be found here: https://hackaday.io/project/164521-dr...

This project is open source - all design files can be found here: https://github.com/mattybrad/drumkid"


"Drum machine are ubiquitous in modern music, but playing them live presents a challenge. When playing electronic rhythms live, whether using a drum machine or a laptop, it can often appear that a musician is simply pressing "play" on a backing track, removing much of the perceived spontaneity of a live performance.

My drum machine, DrumKid, aims to tackle this problem by using a variety of controls to alter a drumbeat live, using randomly generated drum hits which augment the original beat. Rather than being designed as a pre-programmed backing instrument, DrumKid aims to be a playable instrument in its own right, with continuously adjustable controls that work well in a live setting. My intention was to create an engaging, interactive device that, like any musical instrument, can be mastered over time with practice.

DrumKid is an open-source, hackable product based around an ATmega328 chip, as found in an Arduino Uno. The final product features a minimalist design consisting of a single PCB with buttons, knobs, and LEDs mounted on one side, and all other components mounted on the other side. Two laser-cut sections are used to protect the electronics.

I now have a fully working prototype of DrumKid, and I am happy with the audio quality, playability, aesthetics, durability, reliability, and battery life. I am planning to make a small, initial batch of DrumKid units in September to distribute to musicians for testing. After any necessary updates to the PCB design and/or firmware, I hope to build a larger batch of units and launch DrumKid for sale around November/December 2019.

DrumKid can also be constructed as a breadboard/stripboard project using an Arduino Uno - see the build instructions for details."

Sunday, July 07, 2024

Key-bowed / arduino uno r4 minima


video upload by - WASHIYAMA GIKEN -鷲山技研

"Sound is generated by inputting the drive waveform extracted by the piezo sensor to the string vibration model.

processor : arduino uno r4 minima

https://washiyamagiken.hatenablog.com..."

Saturday, June 22, 2013

Custom/Portable ANALOG NOISE Synth

Note: Auction links are affiliate links for which the site may be compensated.

via this auction - video at the auction and below.

"This auction is for one custom analog synth and mini-amp made by foam_FORM. The "Trigguitar"
adds that sonic grit to taste and grinds it down, too. Features include:
- Atari Punk Console inside (capable of some extremely hardcore analog sounds) controlled by an Arduino Uno.
- 6 selectable LED's can be turned on to conrol the pitch based on their light frequencies and intensities
- 6 Photocells can also mod frequencies (most effective on higher pitches)
- Arpeggio programming is possible (screw off one of the side-plates on the instrument to access the Arduino's USB)
- Can be powered using a single 9V battery or with a choice of 2 different power adapters (slightly different tones).
-High-quality HAPP arcade pushuttons
-Includes a mini metal amp (9v battery powered!) with volume knob, 1/4" input jack, and sound/speaker/hole"


Trigguitar Analog _ one Published on Jun 20, 2013

"Here is an example of how you can use an Arduino (or ATMega-related product) to send CV signals to control an external synth. Here I am controlling an Atari Punk Console by sending a PWM (square-wave pulse using the preset "Blink" code) to a homemade digital-to-analog converter. The converter is made of 2 resistors in series which are connected to the positive pin of an eletrolytic capacitor and the Arduino "common" pin. The CV (where the speaker normally goes) is hooked up to common and the negative side of the capacitor. There you have it-- a cheap programmable CV converter!!!"

Wednesday, August 18, 2021

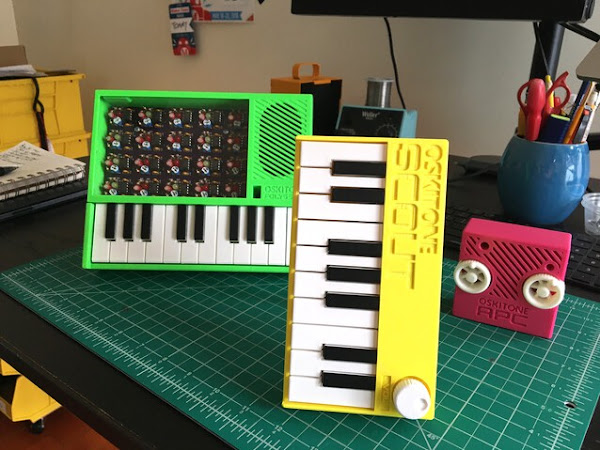
Oskitone Scout Arduino-compatible Open Source DIY Mini Synth

Oskitone Scout Assembly from oskitone on Vimeo.

Putting together the Oskitone Scout, after it's been soldered

http://www.oskitone.com/product/scout-synth-diy-electronics-kit


New from the makers of the POLY555 Synth.

It's called the "Scout" because it's the first Oskitone synth to use a microcontroller, specifically the ATmega328 -- just like the Arduino Uno.

From the readme:

scout (/skout/):

One sent to obtain information
Jean Louise “Scout” Finch, of Atticus Finch
The first synth from Oskitone to venture into the big ol' world of microcontrollers
The Scout is:

Beginner-friendly: All components are through-hole (instead of surface mount) for easier soldering, and full assembly takes about 45min. Standalone, battery-powered, doesn't need a computer or external speakers to work. Fun! 3D-Printable: Besides the electronics and nuts and bolts, all parts are 3D-printed. And with a total width of ~160mm (about 6.3"), the Scout can fit on smaller, "Mini" (18x18x18cm) size print beds.

Hackable: Arduino-compatible and fully open source! Hook up an FTDI Serial TTL-232 cable (sold separately) to update its code using the Arduino IDE.

Minimally featured: 1.5 octaves of keys, a volume knob, on/off switch, speaker, headphone jack. Monophonic square wave with fixed glide and octave.

In addition to it being the first microcontroller-controlled instrument from Oskitone, the Scout would also make a fine introductory DIY instrument for the budding electronics hobbyist. (Some experience soldering and a general familiarity with how electricity works are recommended though!)

Like my previous work, I designed the Scout's PCB in Kicad and everything else in OpenSCAD, specifically for 3D-printing. The Scout is available assembled or as a DIY kit, with and without the 3D-printed parts; and it's fully Open Source!"

via https://blog.tommy.sh/posts/scout/

Tuesday, April 12, 2011

Beat707 Arduino Connection


YouTube Uploaded by beat707videos on Apr 12, 2011

"www.Beat707.com

How to connect the Arduino board, power and midi cables. Starting up the Beat707 shield.

Some people asked why you need an Arduino and why not just add the Arduino chip in the Beat707 board itself. The great thing about been a shield is that you can use on multiple boards: Arduino 2009/Uno, Arduino Mega, NetDuino, FEZ Panda, ..."

Tuesday, July 24, 2012

devsound SJS-ONE Synthesizer


"SJS-ONE is a software defined 8-bit mono synthesizer with a dual (series) MAX261, switch-cap filter, which we are, as far as we know, the only ones to use at this point in a DIY-synthesizer.

The synthesizer has some interesting history that has certainly colored its development and ultimately it’s sound. The initial version was developed as an instructional workshop for a synth-event called SyltJam in 2011. The workshop idea was to show people how quickly you can design the basic hardware and software required to produce a platform for versatile audio and music generation.

As it turned out, people liked it’s sound so much that we decided to refine the design – which more or less involved adding peripheral components to increase configurability and improve on stability and ESD, ground-mismatch and noise sensitivity while keeping the actual design minimal and simplistic.

It’s beginnings are as humble as it’s production – less than 50 of these have been made available and all parts are hand assembled and hand soldered, while the manual is hand drawn and cases hand painted.

Perhaps the most unique aspect of this synth is the choice of digital platform – the Arduino. We did not want to build something static and opted to keep the Arduino instead of adding an on-board microcontroller. Because this will make it so much easier to modify the functionality of the synth firmware provided by us, or to write your own software with a completely unique sound using the vast community support that is available for the Arduino platform.

All aspects of the synth can be fully controlled by designing your own custom firmware and we sincerely hope that people will share their firmware in the spirit of the open source and hardware that inspired us to drive this project from idea to final product.

Host board: Arduino Uno
ATmega328 16MHz
2KB RAM
32KB Flash ROM
Power supply: USB-B 5V DC
2.1mm center-positive barrel 6-12V DC
Output circuitry: 8-bit R-2R ladder DAC
Filter: MAX261
Analog output: ±2.5V signal level (external amplifier required)
Software defined parameters: Waveform
Filter modes
Filter resonance
Filter cutoff
Filter connection (LP, BP, HP)
Filter bypass

You can purchase the SJS-ONE from the DevSound Shop."


http://devsound.se/2012/sjs-one
NEXT PAGE HOME


Switched On Make Synthesizer Evolution Vintage Synthesizers Creating Sound Fundlementals of Synthesizer Programming Kraftwerk

© Matrixsynth - All posts are presented here for informative, historical and educative purposes as applicable within fair use.
MATRIXSYNTH is supported by affiliate links that use cookies to track clickthroughs and sales. See the privacy policy for details.
MATRIXSYNTH - EVERYTHING SYNTH